


Fashion
How to Cut & Sew a Salwar Kameez Suit
by DEE SHNEIDERMAN
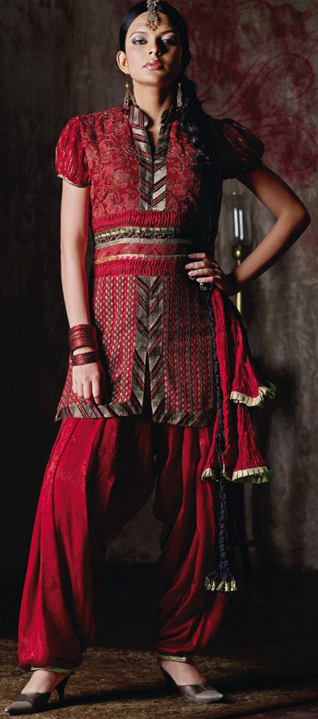
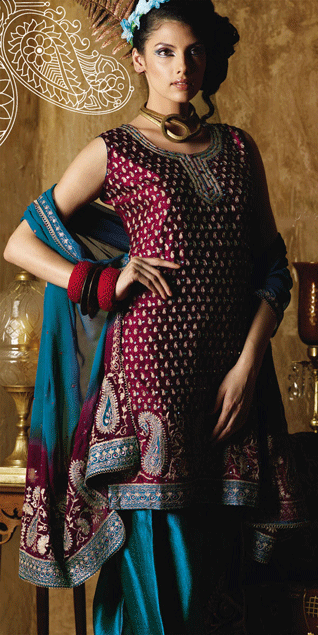
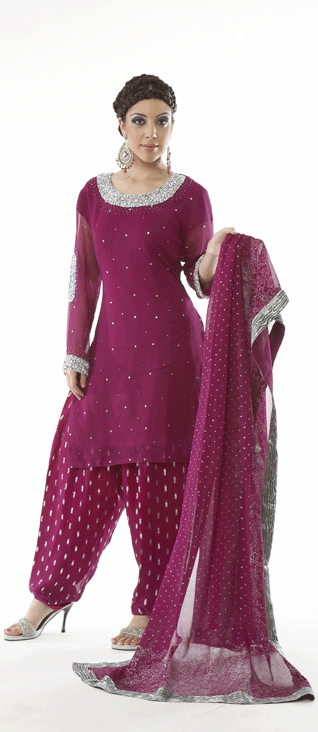
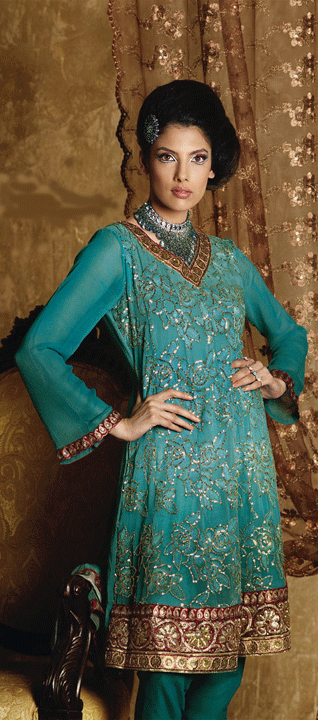
The Punjabi suit, also known as a salwar kameez, is especially popular in Punjab - both in India and Pakistan - but is quickly becoming the dress of choice for females - and in a variation, for some males - across South Asia, and other parts of the world where immigrants from the subcontinent call home.
Usually made of cotton or silk, the salwar kameez is a comfortable alternative to the more formal sari. The suit consists of a salwar- a pant with an elastic or drawstring waistband - and a kameez, a hip or knee-length tunic.
The salwar can be baggy, slim, straight or even loose in the thigh-to-knee area, then taper to the ankle.
The kameez can have sleeves of any length and has an open seam from the waist to the hem on each side to facilitate movement.
INSTRUCTIONS
THE SALWAR
1 Measure the waist and stomach while sitting and relaxed, and the hips and thighs where they are widest. Measure the rise - the total depth from the seat of a chair to the waist - while sitting. Measure the crotch length from the front of the waist through the crotch to the back of the waist. Measure the inseam from the ankle to the crotch, and the outseam from the waist to the ankle along the outside of the leg.
2 Draw a pattern for each piece on a large sheet of paper or a newspaper. Draw a horizontal line that is as long as half of the total waist or hip measurement, whichever is larger, plus 4 inches for seam allowances, which are usually 5/8 of an inch for each seam. If the front crotch measurement is different than the back crotch, slant your waistband line down slightly for either front or back, whichever is shorter. Draw a vertical line from the midpoint of the waistband line to the ankle as long as your outseam measurement plus 2 inches.
3 Draw another horizontal line at the bottom of the leg line. Mark the
crotch seam by measuring down the center from the bottom waistband line
the length of the rise measurement plus 1 inch. Draw the bottom of the
crotch seam by drawing a straight line down the pattern perpendicular to
the horizontal line as long as the widest part of the thigh plus 3
inches. Draw a curve from the outside of the thigh measurement line to
the waistband line at the top of the drawstring casing. The crotch curve
should be slightly fuller at the front or back, depending on which
measurement is longer.
4 Draw the vertical inseam lines from the ends of the crotch seams to the
line at the bottom of each leg. Taper the legs as desired from the
crotch to the ankle, taking care to leave room in the thigh and knee
area for freedom of movement.
5 Determine how much fabric is needed by measuring from the waist to the
floor and adding an extra 8 inches for the drawstring casing at the
waist and the hems at the bottom. If the pants will have an elastic
waist, add 2 inches. Select fabric that is at least twice as wide as the
largest torso (waist or hip) measurement plus at least 4 inches from
selvage to selvage (the finished edges of the fabric). Buy enough fabric
to accommodate the total distance from the waist to the ankle (either
front or back, whichever is longer) plus an extra 8 inches.
6 Fold the fabric in half lengthwise with the right sides together. Pin
the folded fabric together at the top and bottom corners. Pin the
pattern to the fabric parallel to the edges of the pattern. Cut the
fabric with pinking shears (scissors with zigzag notched blades) to
prevent raveling or fraying of the fabric edges.
7 Pin the left and right front crotch seam edges together with the right side of the fabric together. Insert the pins 2 or 3 inches apart at right angles to the edges of the fabric.
8 Stitch each crotch-to-waist seam 5/8 inch inside the edge, using a standard machine stitch of 10 to 12 stitches per inch. Pin and stitch each outseam from waist to bottom of the leg. Leave a small opening at the top of the front seam to run the drawstring or elastic through its casing or leave the drawstring opening in one outseam to minimize bulkiness at the abdomen. Pin and stitch the front inseam to the back inseam starting from one leg bottom up through the crotch. Carefully feed the fabric through the sewing machine to avoid bunching. Continue sewing down the inseam from the crotch to the bottom of the other leg. Remove all pins.
9 Try on the salwar inside out. Mark and pin the leg hems and the elastic or drawstring casing at the waist. Mark and pin any adjustments. Remove the garment and finish stitching the hems, waistband casing and adjustment seams. Turn under the top of the waistband and fold the casing down on the inside and pin it in place. Thread the draw string or elastic through the waistband casing from the front- or side-seam opening,
THE KAMEEZ
a Measure the length from the top of the shoulder to the desired length plus 3 inches for seam allowance and hem. Measure around the bust line or chest and add 2 inches for fullness and seam allowances. Measure the waist and hip widths plus 2 inches. Measure the shoulder-to-shoulder width across the back. Measure the desired sleeve width plus 1 1/2 inches for seam allowance. Measure the sleeve length from the top of the shoulder to the desired sleeve hem plus 2 inches.
b Make a pattern for a T-tunic kameez with the pattern paper. Measure vertically down the top left corner of the paper to the shoulder-to-bottom length, and label it "A." Draw a horizontal line from "A" that is one quarter as long as the hip or waist measurement (whichever is greater) plus seam and fullness allowances and label it "Line 1." Measure horizontally across the top of the paper from the top left corner to a length half as long as the combination of the sleeve length plus hem and the shoulder width, and label it "B." Draw a vertical line from "B" that is as long as the sleeve width plus seam allowance and label it "Line B." Draw a horizontal line from the end of line B straight to the left edge of the page and label it "Line C." Draw a vertical line straight up to the top of the page and label it "Line D." Label the intersection of the two lines "Underarm."
c Erase the lines from the Underarm intersection to the top and from the Underarm to the left edge. A slight inward curve of line D at the waistline area will give a more fitted look and will flatter feminine waists. A curve from line C to line D instead of the angular intersection will give the Underarm area a looser fit. Measure the wearer's head circumference and draw a curve or a "V" at the top left corner for the neck opening that will accommodate the wearer's head. Cut out the pattern along the lines.
d Purchase 60-inch wide fabric in a color or print that matches or
coordinates with the fabric for the salwar. Purchase enough fabric to
fit the measurement of the length of the tunic plus the seam and
fullness allowances.
e Fold the fabric in half. Pin the pattern to the fabric. Be sure that any
border print of the fabric is in the desired places. Cut out the
fabric, forming the front of the garment. Pin the pattern to the fold
again being careful to line up any border prints to match the front
panel. Cut out the pattern except for the neck opening, where you should
cut a shallow curve. This is the back of the garment.
f Pin the shoulder seams of the front and back together, with the fabric
inside out. Stitch the shoulder seams. Pin and stitch the side seams
starting at the sleeve ends and stitching through the Underarm down to
the bottom hem. Hem the sleeves and the bottom edge. Turn the neck
opening under and hem it. Finish the neck, sleeve ends and bottom with a
strip of embroidered tape or other decorative trim.
TIPS & WARNINGS
i Fabric can be 45, 54 or 60 inches wide. The 60-inch width is often the most economical choice.
ii Wash and dry the fabric before cutting and sewing to ensure that it is preshrunk.
iii If the fabric has a decorative print with a definite top and bottom, add
extra inches to your measurement to accommodate the pattern of the
print.
iv Sewing patterns for workout pants or scrubs can be used for the salwar
and patterns for tunics or scrub tops can be used for the kameez.
v Cut and sew a mock-up of your garment out of inexpensive, light-colored
plain fabric before cutting into more expensive material.
[Courtesy: eHow]
August 19, 2010
Conversation about this article
1: Satinder Singh (New Jersey, U.S.A.), August 20, 2010, 11:54 AM.
I wish someone (besides me) could tell my wife that it is okay to depart with the suitcases full of old Salwar Kameez suits she has which starts from our wedding days ... not to mention the dozens hanging in the closet. Maybe someone can write a story on Salwaar Kameez life-span etiquette ... how many times a woman should wear her suits, how to bring a cut that is out of style to the modern style, etc. Hopefully, one day I will have room to hang my shirts. : )
2: B. Kaur (U.S.A. ), August 21, 2010, 1:03 AM.
I have always wanted to learn how to sew my own suits. Now, step by step, I will learn! What a great article for beginners like me! :)
3: Maariya (Birmingham, United Kingdom), August 25, 2010, 4:10 PM.
Love it! :)
4: Fareesh (Kandy, Sri Lanka), November 07, 2010, 10:35 AM.
Where can I get the matching drawings?
5: Mangal Lad (Noida, India), January 04, 2011, 5:18 AM.
Thanks a lot for the detailed instructions, but it would really be of help if we could get the diagram of the kameez measurements, please.
6: Mangal Lad (Noida, India), January 12, 2011, 1:18 PM.
Can we get a diagram or pattern? That will make it easier.
7: Shahida Praveen Jhullan (Shahpur Chakar, Sindh, Pakistan), June 24, 2011, 9:13 AM.
Can we get a diagrams or pattern, that will make it easier?
8: Amir (Muscat, Oman ), November 02, 2011, 1:55 AM.
It's very good to see this article, because I'm also a dress master, and because of this site I have learnt new things. Keep it up.
9: Prachi (Bangalore, India), November 17, 2011, 3:17 AM.
Thanks a lot for the detailed instructions, but it would really be of help if we could get the diagram of the kameez measurements, please.
10: Shashikala (Mumbai, India), December 12, 2011, 3:45 AM.
Need some drawings on the salwar kameez.
11: Madhvi (India), September 13, 2012, 11:56 PM.
It's nice to have an article like this but, at the same time for the beginners, it's important to provide a draft also so that the learner is at more comfort.
12: Zahra (Rawalpindi, Pakistan), November 05, 2012, 9:49 AM.
I like sewing my own clothes.
13: Deepika Zion (Pune, India), December 08, 2012, 6:45 AM.
I read your article. I liked it. I'll go through it again because I love to sew my own dresses.
14: Shaheen (india), September 26, 2013, 12:56 PM.
Very nice.
15: Parminder Sidhu (Pune, India), September 28, 2013, 1:14 AM.
Thanks a lot for the detailed instructions, but it would really be of help if we could get the diagram of the kameez measurements, please
16: Val (Langley, British Columbia, Canada), October 23, 2013, 10:38 PM.
I agree with everyone else, we need some diagrams to help us through the process. I ordered a suit and it came unstitched (I thought it would be cut out, not 3 pieces of fabric.) Going to try to do this, we'll see, no pattern, no diagrams. Help.
17: Christina (Burnaby, British Columbia, Canada), March 02, 2014, 1:15 PM.
I would love any old suits you don't wear anymore.
18: July Ana (India), March 11, 2014, 7:33 AM.
It would be good if you had a video on how the measurements are actually taken and how to draft them on the paper or the material.
19: Ajukhara (United Kingdom), June 06, 2014, 6:06 PM.
Is there an easy way of obtaining the patterns for it?